What is JNC (Juniper Network Connect)?
Network Connect is a software package from Juniper Networks that interfaces with its Secure Access hardware and provides a Virtual Private Network (VPN) solution. There are two software products that connect to Secure Access servers: Windows Secure Application Manager which, as you might guess, runs on Microsoft Windows; and Network Connect which runs on other platforms, in particular GNU/Linux.
So, GNU/Linux is supported! Great! Well, sort of. Juniper has fallen into the common trap of supporting Red Hat Enterprise Linux and calling it good enough. It's quite frustrating, since with an extra hour or two of effort these companies could create a portable solution. I realize that support costs money, but even if they only officially supported Red Hat Enterprise, it wouldn't hurt them to go the extra couple of centimeters necessary to provide a more generic implementation.
Equally frustrating, even on RHEL the provided user interface utility has a number of missing features. Finally, it's written in (32bit only) Java, and does not work well with non-Sun/Oracle versions of Java which makes for many problems on 64bit systems and versions of Linux which don't have official Sun/Oracle Java packages.
Luckily, the actual VPN software works fine on these other systems; it's the invocation script and especially the installer that are utterly broken. This utility (written in Perl/GTK2) attempts to provide a more functional, better-supported interface to Juniper Network Connect session management.
Making It Work
Package Requirements
Since the Network Connect software is 32bit you must have 32bit C runtime support libraries installed on your system. For most Red Hat-based systems these will be available by default.
On newer versions of 64bit Ubuntu that support multilib you will need to install 32bit libraries, like this:
sudo apt-get install libc6:i386 zlib1g:i386
If you get the cryptic, useless error ncsvc: No such file or
directory even though the file is clearly right there,
this is what's happening. Install the 32bit libs.
In order to use the script you must have Perl and Perl/GTK2 installed.
On Debian/Ubuntu systems run:
sudo apt-get install libgtk2-perl libwww-perl
On Red Hat/RPM-based systems you should be able to run:
sudo yum install perl-Gtk2 perl-libwww-perl
A critical aspect of the VPN is that your DNS resolution information is
reset to point to the DNS server of the VPN; this allows you to resolve
internal hostnames that aren't registered outside the VPN. Usually, when you
exit the VPN tool it will restore your original DNS settings. However, I have
seen this fail; when that happens your system can no longer resolve any
hostnames. It seems like the network is broken but it's actually a trivial
fix... if you know what your original DNS server was. I recommend making a
copy of the /etc/resolv.conf file on your system so you can copy
it back later if necessary.
Step 1: Install MSJNC Session Manager
First you need to install my script onto your system:
Download the msjnc scriptPut it somewhere on your PATH; I typically create ~/bin and
add that to my PATH for these sorts of things. Don't forget to ensure the
script is executable after you download it.
If you didn't understand the previous paragraph, then open up a terminal
(use Applications -> Accessories -> Terminal) and enter these commands; none
of them should give you any error message. You will need to type your
password when prompted (after the sudo command)
wget -q -O /tmp/msjnc https://raw.github.com/madscientist/msjnc/master/msjnc
chmod 755 /tmp/msjnc
sudo cp /tmp/msjnc /usr/bin
Step 2: Install Network Connect Software
The Network Connect software is installed automatically when you first connect to the server. Although this install will fail on Ubuntu due to the fairly stupid scripting Juniper provides, it's still necessary to go through this step to obtain the software.
So, connect to your Juniper VPN server with FireFox and log into the VPN. You should have received instructions from your IT department or whomever manages the server on how to do this.
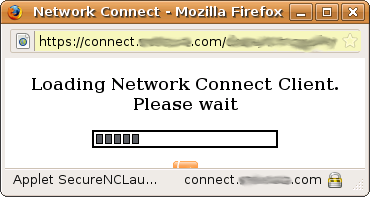
Once it's done you'll see something like this (maybe after some other
links); Click the "Start" button next to "Network Connect":

The Network Connect software will download:
The software will pop up a terminal window asking for the root password:
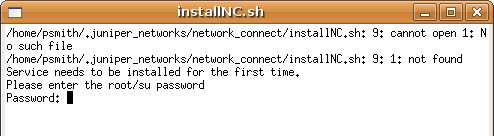
Of course, on Ubuntu root doesn't have a password and the script is not smart enough to consider using sudo. So ignore this: hit ENTER and when it asks if you'd like to try again, hit ENTER again. You will get an error message about SSL; click OK. This will cause the startup to fail, but that's fine because it's left behind the downloaded software which we can then use with a more portable installer.
Before continuing, log out from the VPN connection in the browser. There should be some kind of exit button on the page. If you can't find it, exiting your browser should do it. We won't be needing it anymore anyway.
Step 3: Run msjnc
To complete the installation, you should invoke msjnc. To do
this, open a terminal window (Applications -> Accessories -> Terminal) and
type msjnc. Whenever the script runs it checks to be sure
everything is set up and, if not, will do it for you. It will ask for your
password; if that doesn't work (your system doesn't have sudo configured) it
may ask for the root password.
Running msjnc will create a new menu item in your desktop called Network Connect, under the Internet or Networking menu. You can use this in the future to start or stop the VPN. You can also drag it to your Panel or Launcher or whatever. If your desktop manager or panel supports Actions as per the spec (often invoked by right-clicking the menu item for example) then there will be extra actions available for stopping the VPN, as well as configuration options.
Step 4: Create one or more profiles
Use the "Profiles" menu and select the "New" option to create a new profile. Enter values for your Juniper Network Connect VPN server. If you don't understand the options you can run "perldoc msjnc" to get more documentation.Step 5: Select a profile as the default (optional)
Use the "Profiles" menu and select one of the profiles you created as the "default" profile. This is not necessary if you only have one profile.Startup
Whenever you click the "Connect" button in the msjnc utility, you will
prompt you for your VPN password or the SecurID PIN plus the fob value, if
your company uses SecurID fobs. Alternatively you can start the VPN session
from the command line with the --connect option.
Troubleshooting
Some servers want you to use HTTPS but will (confusingly) perform some early operations correctly with HTTP. The script will try HTTPS by default if you specify HTTP and it doesn't work, but if you use an HTTP URL and can't connect, try again with HTTPS.
A number of people have written me to ask about multi-key logins. I don't
have any knowledge of or experience with these and my (very limited)
investigation of the Network Connect service doesn't show how to do this from
the command line. If someone can describe what the expected interface to
the ncsvc program is for these situations I'll try to add support
for it.
If you can't access any network hosts after bringing down the VPN, it's
probably because your DNS server was not reset properly. You did
take my advice above and make a backup copy, right? Suppose you called the
backup ~/resolv.bak; then you'd run this command to restore your
network:
$ sudo cp $HOME/resolv.bak /etc/resolv.conf
If things still don't work for you you might try asking on one of the Ubuntu forum threads dedicated to this subject.
Mailing List
I have created a mailing list for information on the script. The list is moderated so don't worry about spam, etc. It's also extremely low-traffic, I expect. You can subscribe using this link.